Mount Rainier 1 Day Itinerary: 3 options for 2024
If you’re planning a trip to the Pacific Northwest, a visit to Mount Rainier National Park has to be on your list. This is the perfect addition to a road trip or an ideal day trip from Seattle.
But, if you don’t have a week to spend there I get it. There just isn’t enough time! This Mount Rainier 1 day itinerary will help you make the most of a short stay!
I’ll discuss when to visit, what to see, where to sleep, and the hikes you should consider. I’ll give you my suggestions so you can plan the perfect one-day itinerary for Mount Rainier!
There are three different options below, so you can pick the one that sounds the most fun to you.
Some of the links on the page are affiliate links. If you choose to purchase from one of the links, I earn money at no extra cost to you. I’ll only recommend brands I’ve used and love (or an alternative I would book myself). As an Amazon Associate, I earn from qualifying purchases. I always pay for my own travel. I’ll be sure to let you know if that ever changes. If you choose to click through and purchase – thanks so much for the support!
About Mount Rainier
Like most national parks, Mount Rainier is spectacular! It was a sacred land for Native American tribes long before it was “discovered” by settlers or designated as a national park.
Mount Rainier is a volcano and experiences about 20 small earthquakes each year. It last erupted about 150 years ago and is still considered active. It’s the tallest mountain in the Cascade Range.
You could choose to visit five developed areas in the park: Longmire, Paradise, Sunrise, Carbon/Mowich, and Ohanapecosh.
For a single day, try to see at least a couple of the areas. The park is diverse, and each area is worth seeing. But you can’t do it all in one day.
They are connected but not super close since you have to go around the volcano that sits in the middle of the park.
Permits
Many National Parks are moving to reservation systems. As of 2024, if you’re visiting Rainier for the day, you don’t need a reservation; you just need to pay the entrance fee.
To stay overnight, you’ll need a campsite or lodge booking. But, more on that below.
My Essentials for National Park Trips
Great Hiking Shoes. I love Chacos sandals AND my Timberland boots. I really hate hiking boots so it’s high praise for these Timberlands! Chacos pro tip- don’t be tempted by the 3-string option. They are impossible to adjust.
Thick, comfortable socks to keep my boots from rubbing my feet. As a bonus, I can wear them with my Chacos like a total dork for that weird “not quite warm enough” weather.
My Osprey Day Pack. I’ve had it for years. I have no intention of ever getting another day pack.
Binoculars are a must. Every time I forget them I regret it.
My Nikon Z5 is my go-to camera. I love the 70-200mm lens for photographing wildlife.
My Eddie Bauer Rain Foil Jacket is the best rain jacket.
Mount Rainier 1-Day Itinerary-Paradise Area
The Paradise area of the park is nearest to the base of the volcano. You can get an amazing view of the mountains, and it’s closer to a few other areas. If I was picking, this is the itinerary option I’d go with.
With this itinerary, you’ll have the opportunity to experience 3 areas of the park!
Assuming you’re staying in or near the park, get in and get going early! If you’re up for sunrise and the weather cooperates, you won’t be disappointed.
For this option, you’ll want to sleep in the Paraside Inn, National Park Inn, Cougar Rock Campground, or the Ohanapecosh Campground. If you’re up in the White River area, you’ll be quite far away; that’s the next itinerary.
There will be a lot of hiking options in any of my itineraries. You don’t need to do hard hikes to experience the park but you should do some walking outside if you can!
Hike the Paradise Area
Start the day with a hike near the volcano. There are several hikes in the Paradise Area.
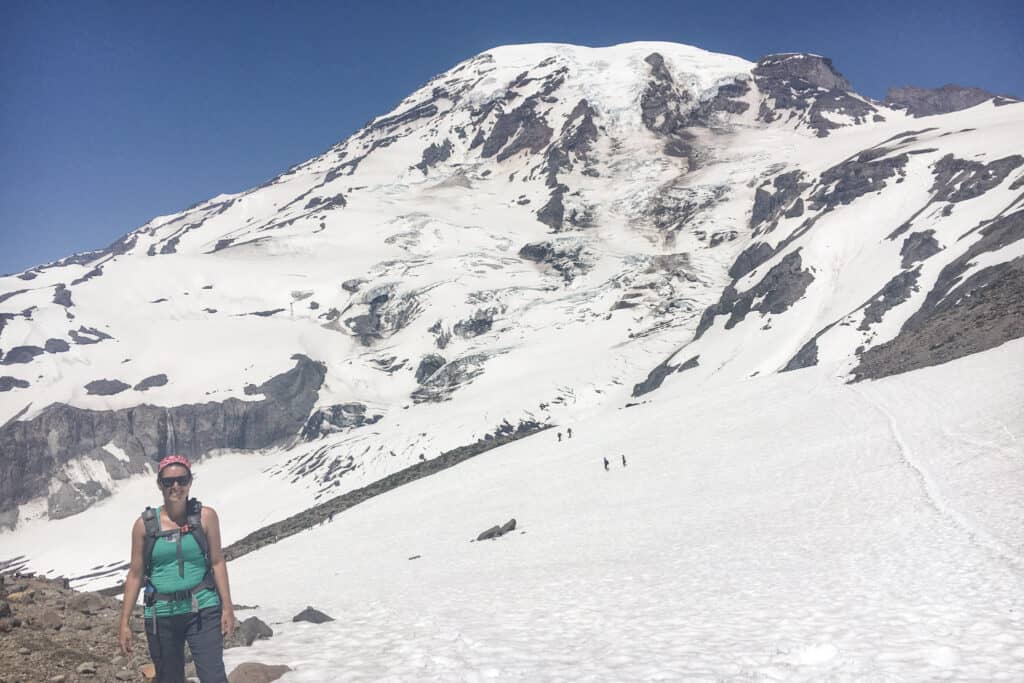
This area of the park provides excellent views of the glaciers on the volcano. Plus, in the right season, you’ll see wildflowers here!
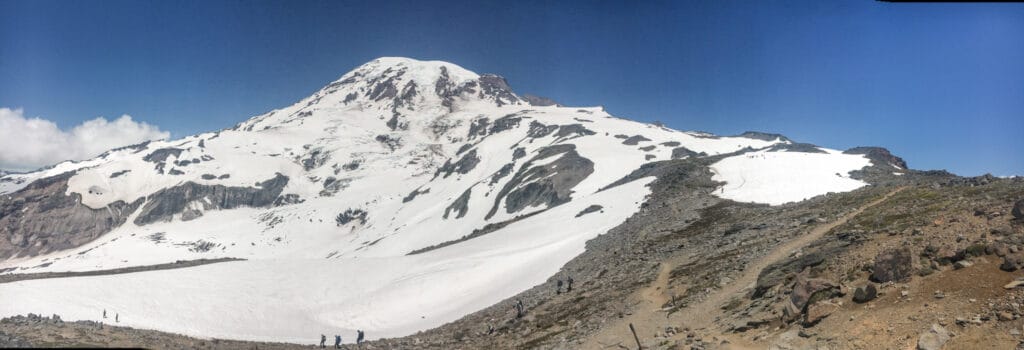
Moderate Hike Option- Skyline Trail to Panorama Point
The Skyline Trail was easily my favorite hike in Mt Rainier National Park. It is a 5.4-mile loop with 1,700 feet of elevation gain. It starts at the Paradise Meadows & Skyline Trailhead.
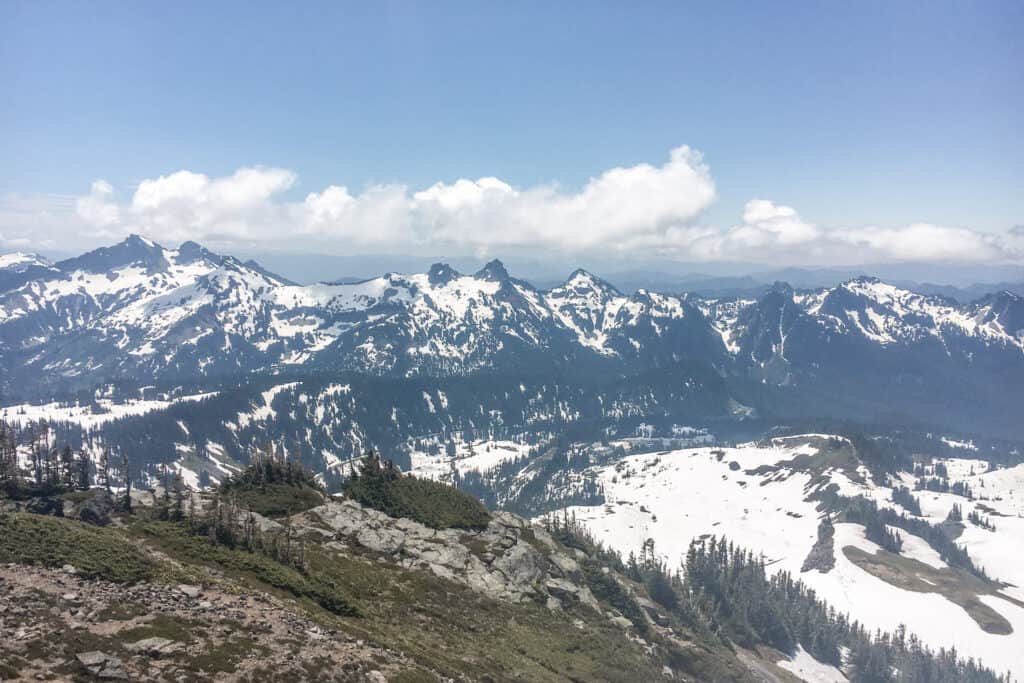
You’ll walk through the alpine meadows. At Panorama Point you’re rewarded with incredible views of the valley, the mountains, and Mt St Helen’s as long the weather cooperates!
Note that, even in Mid-Late June, the trail could have snow on it. It just depends on what the snowfall was like that year. Pack accordingly and check the trail reports at the Henry M Jackson Visitor Center before you head out.
The trail could take 3-4 hours depending on how much you stop and how quickly you hike. Enjoy a snack at the top while you take in the views!
Even though this is a 1-day itinerary in Mount Rainier spending the whole morning on this hike is unquestionably worth it if you’re up to it.
Easy Hike Options
If the skyline trail sounds like too much there are other options.
The Nisqually Vista Trail is a 1.2-mile paved loop trail. It winds through the meadow in Paradise giving you views of Mount Rainier and the Nisqually Glacier. Visiting in late July- Early August means you could see the wildflowers blooming.
The Myrtle Falls Trail is a .8-mile out-and-back trail. It’s also paved except for some stairs at the end. Follow the Skyline trail from the Paradise Meadows and Skyline Trailhead. Follow the trail to the right for about .3 miles. There is a turn-off on the right to take to the Myrtle Falls viewpoint. If you come to the bridge across Edith Creek you’ve gone too far.
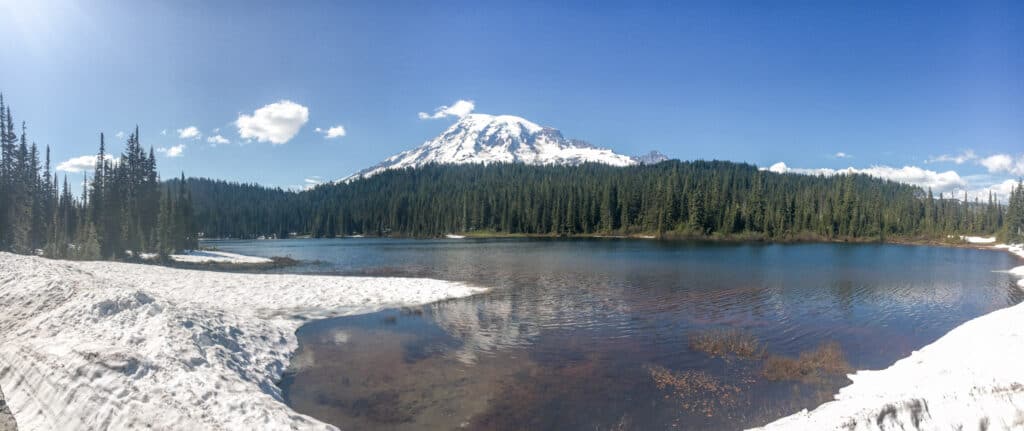
Admire Reflection Lake
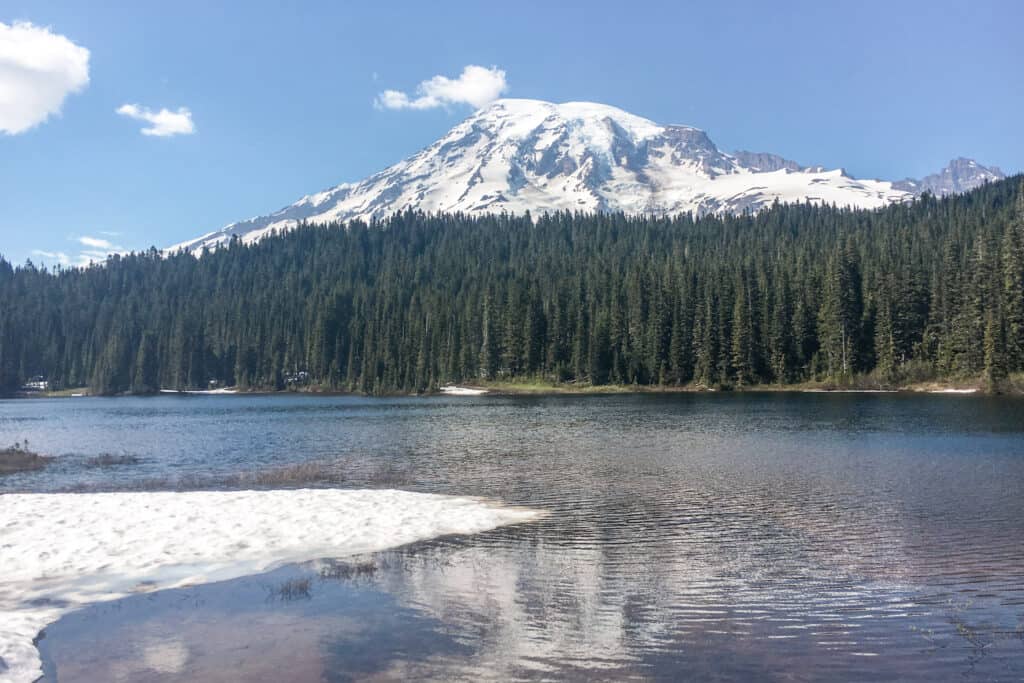
After you finish hiking around the base of the volcano, go to Reflection Lake.
If you love views, stop at Inspiration Point on your way to the lake for another stunning lookout.
The pull-out here provides one of the best photographs in the park. Mount Rainier reflects on the water of the lake if you’re lucky. It’s incredible.
It’s a popular look, so expect it to be busy.
But it’s still worth it.
With any luck, you’ll get an incredible picture of Mount Rainier!
Hike Option
If you want to hike around some lakes, head down the Bench and Snow Lakes Trail.
The trailhead is 1.5 East of Reflection Lake. So, it will be on your way to Ohanapecosh. The trail is 2.5 miles round trip and takes you by 2 different lakes. The first is Bench Lake and the second is Snow Lake. If you’re visiting early in the season the lakes may still be snow-covered.
If you plan to spend your day on short hikes this is a good option. If you opted for the Panorama Point trail you may want to keep driving.
Visit the Ohanapecosh Area
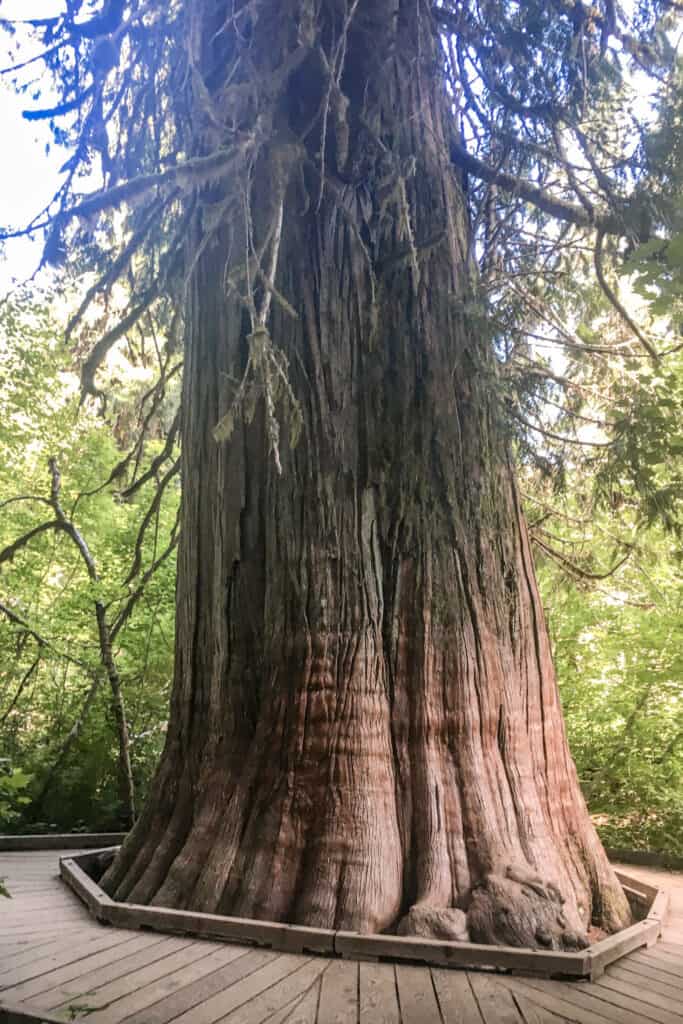
This area of the park is known for its old-growth forest. It’s home to one of the campsites you could stay at. But, it isn’t open in winter so you’d need to visit from June to October.
But, in the summer, it is generally a little sunnier and warmer here than on the mountain. So, if the fog rolls in, head down to Ohanapecosh.
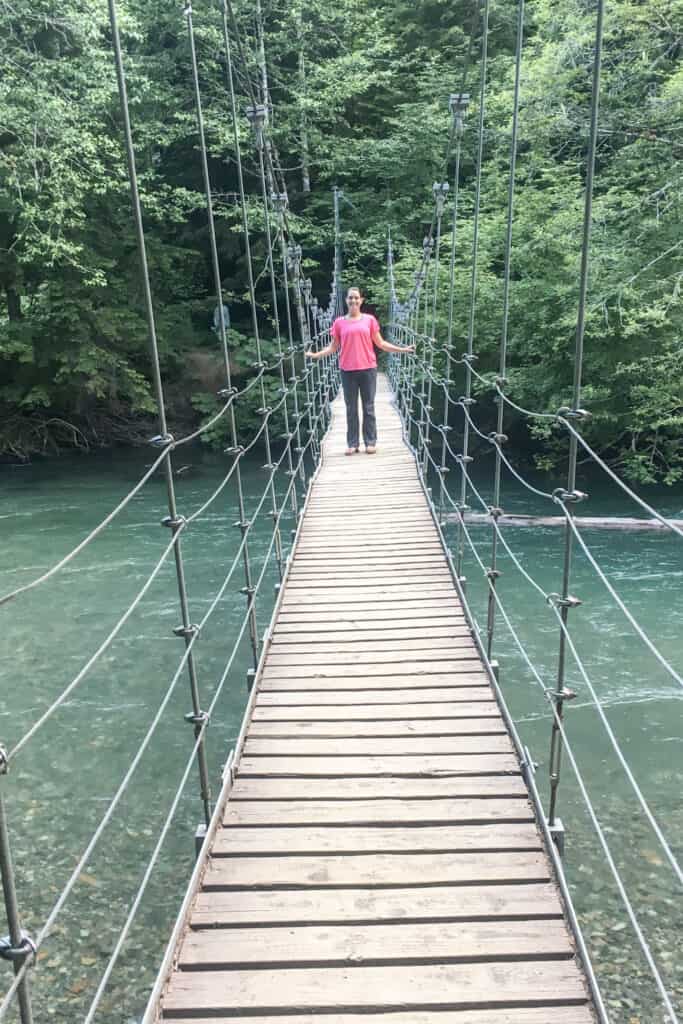
This old-growth forest has special hikes. The most well-known is the Grove of the Patriarchs. The Grove of the Patriarch’s Hike is closed. A bridge is washed out so the trail will be closed until the bridge can be replaced. It isn’t expected to be replaced in 2024.
Other Hike Options
The Hot Springs Nature Trail is an easy hike option in the area. The Hike is only .4 miles and gains only 100 ft in elevation. The trail leaves from the visitor center and ends at the campground. It’s a quick one but it’s nice to have quick hikes sometimes!
The Silver Falls Trail is the trail to do if you want a longer alternative while the Grove of the Patriarchs is closed. The trail can be reached from three trailheads. But I’d start from the Ohanapecosh Campground or the Steven’s Canyon Road Trailhead.
The Steven’s Canyon Road Trailhead is across the road from the Trailhead for the Grove of the Patriarchs. From this trailhead, the hike is only 1 mile but still has the 300 ft of elevation change. I like that it’s shorter, and 300 ft isn’t too terrible. So, I’d start from this trailhead.
The Ohanapecosh Campground trailhead starts from loop B. It is a 2.7-mile hike that gains 300 Ft. In elevation. It’s slightly longer, but the parking may be easier if you’re already at the campground.
If you Have Time, Wander in the Longmire Area
After visiting Paradise, Reflection Lake, and Ohanapecosh, you could be exhausted!
If you are, it’s okay! You’ve already seen some of the best sites in the park.
If you’ve still got time and steam head to Longmire.
The Longmire part of the park is an hour from the Ohanapecosh area of the park. But, this part of the park used to be the park headquarters. So, there are trails and information about the history of the park.
After several hikes, you may want to spend time in the museum learning about the park’s history.
But, if you’re up for it there are hikes through the forest here and information about the first homesteads in the park.
Hike Options in Longmire
There are long hike options in Longmire, but for a 1 day in Mt Rainier itinerary, there isn’t time for those.
So, we’ll stick to the short hikes.
The Trail of Shadows is a short .7-mile trail around the meadow. It starts across the road from the museum and shows the early history of the resort here.
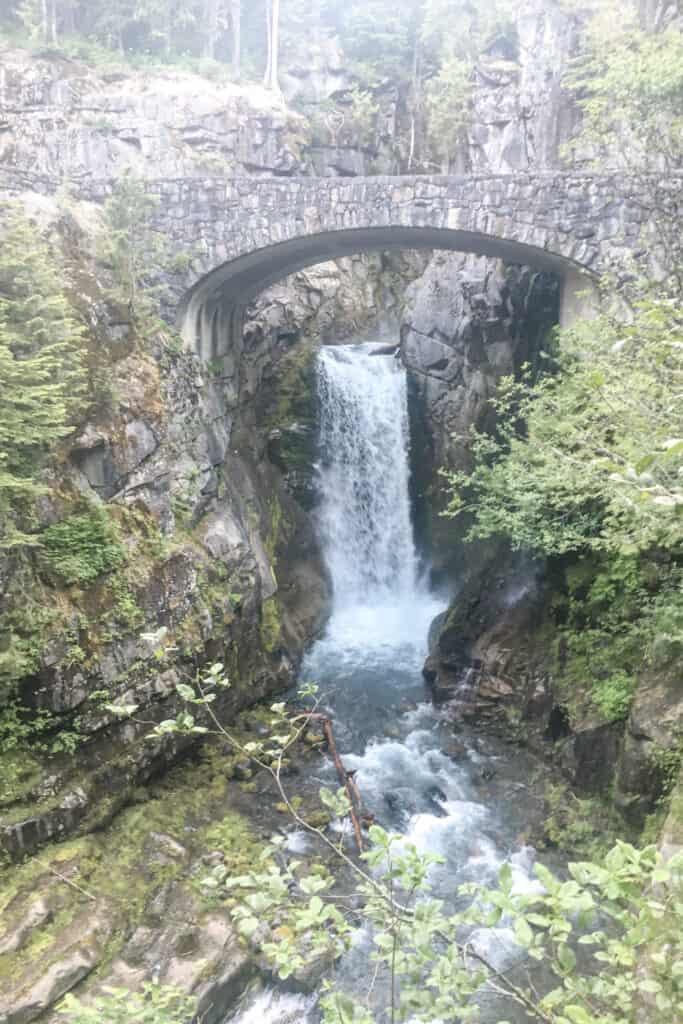
The hike to Christine Falls is really part of the Comet Falls Trail. The trail is east of Longmire. Traveling from Longmire toward Paradise, the parking and trailhead will be on the left side of the road. If you see Christine Falls from the road, you’ve passed the trailhead.
The trail descends about 100 ft in .3 miles for a few of Christine Falls with a bridge. The hike to Comet Falls is another 1.5 miles with much more elevation change.
Christine Falls is visible from the road if you don’t want to do the hike down. But the view from the bridge is better.
Stargaze
Mount Rainier is an excellent dark-sky location! It’s far from major cities and at elevation so you avoid some of the light pollution that gets in the way of most stargazing.
Look for the visitor center’s Ranger-led “Night Skies” program to get information. It’s not every day, and it’s only offered if the weather permits. The program runs in the summer and is a special opportunity.
After dinner and a rest, head back up to the visitor center parking lot in Paradise.
The program starts late because you need a super dark sky. So, even in the summer, it’s cooler than you’d expect it to be.
Rangers will set up massive telescopes and point them at whatever happens to be in the sky that night. Take turns with other visitors looking through telescopes. Learn from the rangers and ask questions.
I had never been to a stargazing program like this, and it was really special. It remains one of my favorite national park activities!
Mount Rainier 1 Day Itinerary- Sunrise Area
If you choose to visit the Sunrise Area of the park, you’ll do a little driving. But this area provides a whole different viewpoint of the mountain and a different environment for hiking.
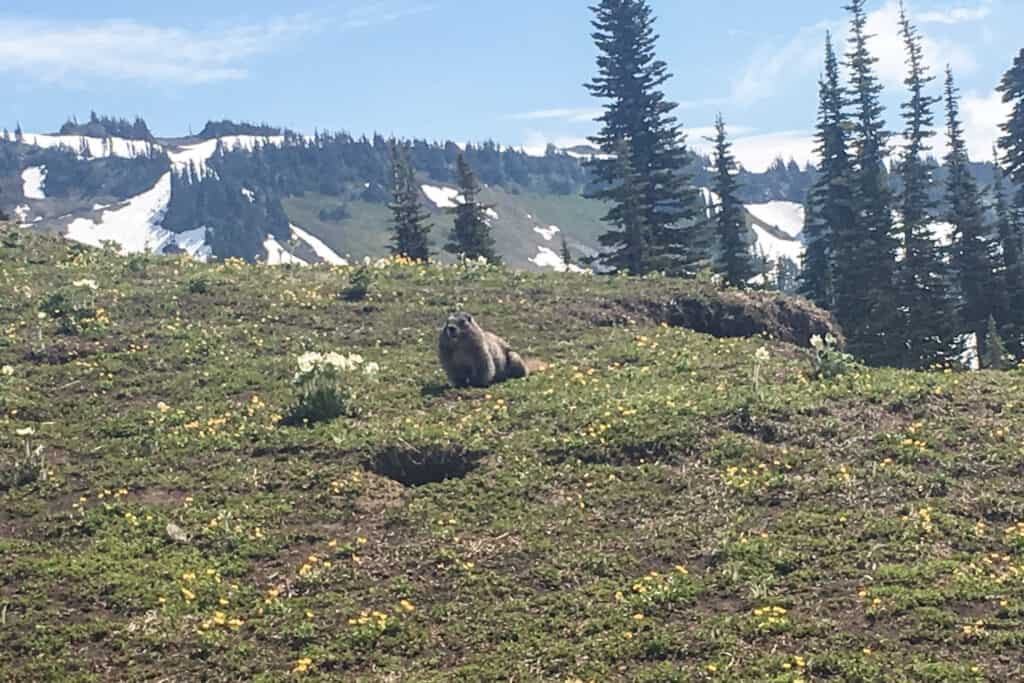
The Sunrise area is the highest you can go up the mountain by car. So, you get incredible views of the volcano and the valleys surrounding the park. Plus, alpine wildflowers.
If your main goal is hiking big hikes then you might want to consider Sunrise. Note that Sunrise is only open seasonally. So, if you want to spend time here you’ll need to plan for a summer trip (July- September).
Sleep in the White River Campground or the surrounding area.
Wake up for the Sunrise
The sunrise in the Sunrise area of the park is where it gets its name. Be sure to catch the sunrise over the volcano and the valleys.
Hike Sunrise Area
Staying in this area of the park means hiking! This is the second most popular area of the park, after Paradise, so it may be busy. But, theoretically, not as busy as Paradise!
There are hikes with great views on this side of the park. Plan to spend your morning hiking whatever trail(s) you decide on.
Hike Options
In Sunrise, you don’t have to take a hard trail to get big payoff.
The Sunrise Nature Trail is 1.5 miles with 300 ft of elevation gain. It’s a self-guided loop that provides incredible views of Mount Rainier.
The Silver Forest Trail is 2 miles with 150 ft of elevation gain. You’ll follow the Sunrise Rim trail for a bit and then spur off on the Silver Forest Trail. You’ll find the Emmons Vista overlooks and take in incredible views!
If you want a difficult hike the Sunrise Rim Trail is a good option. It’s 5.2 miles with 1,000 ft of elevation gain. So, it’s a tough one and will take several hours. But, you get to a great glacier overlook and views of the mountain range.
Take a Drive to Ohanapecosh
Ohanapecosh is about an hour from White River if you’re driving in the park. On the way down, I’d recommend driving straight through. Or, find a fun lookout to picnic if you’d like to eat lunch.
Spend some time hiking around the old-growth forest in Ohanapecosh.
As mentioned above, The Grove of the Patriarchs is the most popular trail. It’s closed in 2024 but there are other hike options.
But no matter which trail you take, spend time in the forest. The trees are stunning, and it’s a nice change from being on the mountain.
You can make some stops on the way back if you feel up to it.
Consider stopping at Chinook Cascades and Lower Dewey Creek Falls to get your waterfall fix before heading back to camp.
Eating in Mount Rainier National Park
As with most national parks, there aren’t many restaurants in the park.
If you’re camping, pack in enough food to get you through your stay. If you’re using a campervan you can keep enough in the little fridge to get you by.
If you’re staying at one of the lodges, consider stocking up on lunch options on your way into the park. You’ll likely want to eat breakfast and dinner at the lodges, but you could also pack things for breakfast!
There aren’t many restaurants in the park but if you want to leave the park for food you can exit near Ohanapecosh and go into Packwood. Just know that you may have to deal with traffic as you come back into the park.
Can you visit Paradise and Sunrise in one day?
Can you visit Paradise and Sunrise in one day? It would be tough. You could make the drive, but you’d miss out on seeing a lot.
If you’re day-tripping, you’ve got no real chance of making it work.
But, one perk to staying in the park instead of day-tripping is that you may be able to get a little creative.
It would technically be more than a day. But there are options that could work.
How to Visit Paradise and Sunrise in a 1.5-Day Itinerary
If you’re camping in the park and you want to see as much of the park as possible, you can use the day you drive in and the day you leave to make it happen.
Consider something like this if you’re heading to Seattle after visiting Mt. Rainier:
- The afternoon/evening you drive in: Explore Longmire
- Sleep night 1: Paradise side of the park
- The morning of Full Day: Paradise (Mt Rainier and Reflection Lake)
- The afternoon of Full Day: Ohanapecosh
- Sleep night 2: White River Campground
- The morning you drive out: Hike in the Sunrise area
If you want to travel to Portland (or California) after Mount Rainier, consider flipping the previous list around—you can do it in reverse!
Even with the extra time, you’d still be moving quickly. But, it wouldn’t add much time to a 1-day itinerary in Mount Rainer and is probably worth it!
When to Visit Mount Rainier
The most popular time to visit Mount Rainier is in July and August. This is when the weather is best, and the wildflowers are blooming.
In the springtime, waterfalls and streams flow more fiercely, with the snow melting off.
In the fall, the leaves change, making the area around the mountain vibrant with fall colors.
Part of the park shuts down in winter. So, if you’re into winter sports you may want to visit.
For most of us, the popular summer months are when you should visit. Know that there will be crowds and be prepared to deal with them. The beauty of the area is worth it!
Getting into Mount Rainier National Park
Park entrance to Mount Rainier is $30 per car for 7 days. You can buy your pass online before you visit. Taking care of it may get you into the park a little faster. Make sure you save a screenshot before you go since you never know how wifi and data will be in national parks.
But, if you’re going to visit other parks or taking a road trip around the northwest, like Crater Lake or Olympic, consider the “America the Beautiful” annual pass.
This pass gets you into all of the US national parks and only costs $80. Since it would literally require an act of Congress to up the price, it’s a steal!
As of summer 2023, Mount Rainier is a cashless national park. Have a credit or debit card when you visit.
This ISN’T a Day Trip Itinerary- This is why
Mount Rainier gets busy. Since it’s only a couple of hours from Seattle it would make an excellent day trip! But, it’s popular in the summer. So, staying overnight gets you more time in the park.
It’s a bonus that your extra hours will be when the daytrippers aren’t around!
While visitors from the Seattle area are driving in you can catch a sunset or get a hike in before the crowds arrive.
Or, when they leave, you can head up to the visitor center at the base of the volcano and do some stargazing.
Staying in the park requires some planning, but it makes the rest of your time in the park more flexible!
This is a good itinerary to sneak into a road trip plan if you have more time.
Mount Rainier 1 Day Itinerary- Where to Sleep
Staying in Mount Rainier National Park is special and opens up opportunities to see more!
Camping Options
There are three campgrounds in the park.
Cougar Rock and Ohanapecosh are open from Late May until September. White River, on the Sunrise side of the park, doesn’t open until late June.
All campsites are on a first-come, first-served system. But, you can still make a reservation to Cougar Rock and Ohanapecosh online for some of the spots. But unless you book super early, plan to arrive at the campground at check-in to get a campsite!
The Cougar Rock campground is a perfect location for a day in the park on the Longmire/Paradise side. The campground is beautiful, and the location is perfect. Try to get here if you can.
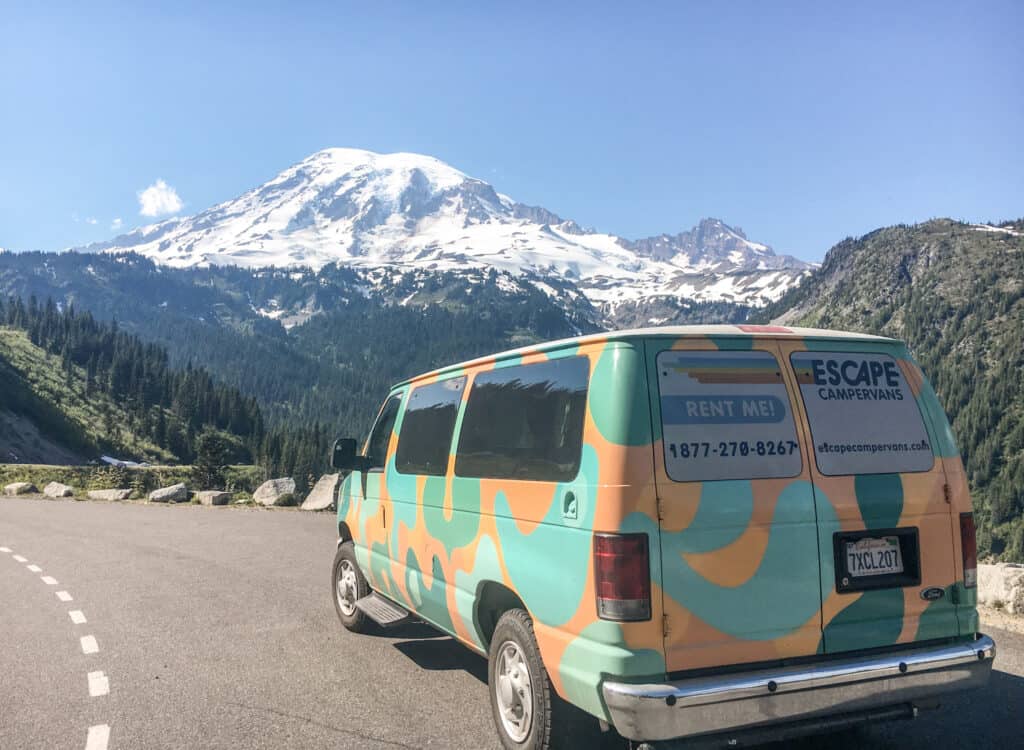
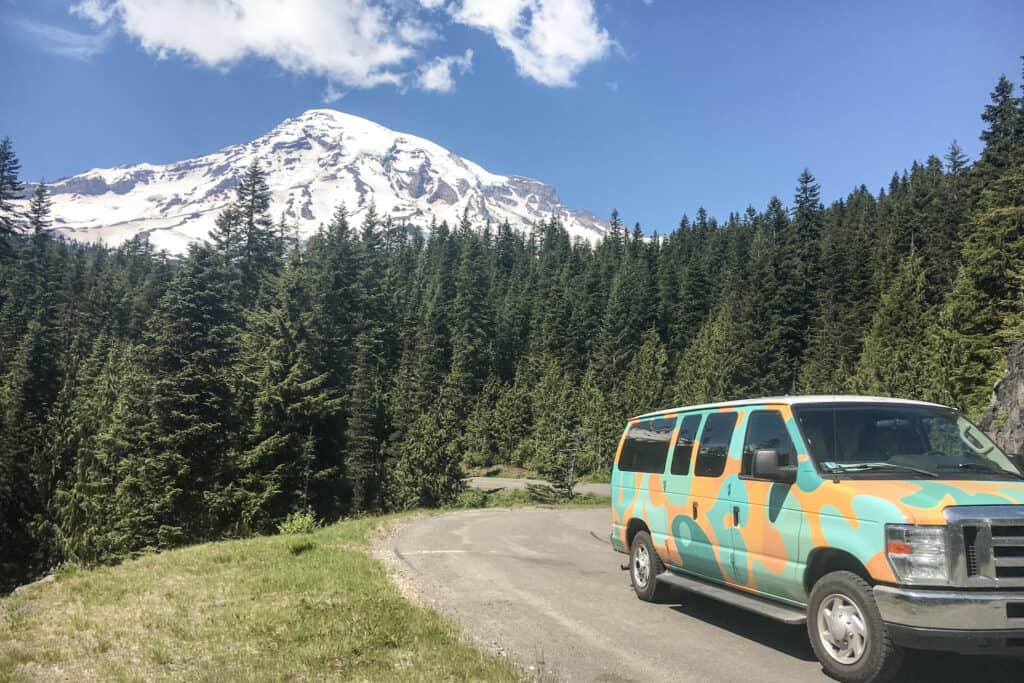
If you aren’t a tent camping person, consider renting a campervan. I am not a tent camper; I don’t do it. Ever. But I’ve loved every trip I’ve taken in a campervan.
They really make it easier to be gluten-free in a national park.
I’m not even an affiliate for them. I just really loved it! So, give it a go if you’re down for the adventure!
Non-Camping Options
If you aren’t into camping, there is a lodge on each side of the park. The National Park Inn is in the Longmire district it is open year-round. The Paradise Inn is in the Paradise district of the park but it is only open May-September when the weather starts to clear.
The two lodges aren’t far from one another, and neither of the lodges is exceptionally large, so if this is your plan, book your spot early.
There are several other hotel/lodge options that are close to the park if you can’t get a spot at one of the lodges.
Tips for Your Mount Rainier 1-Day Itinerary
- Don’t plan too much. Give yourself time to enjoy the park without rushing around.
- To get the most out of your 1 day in Mount Rainier plan to sleep there for 2 nights. Then you can spend all day in the park.
- Be prepared for unpredictable weather. The volcano creates its own weather so it can change quickly. Bring layers, a rain jacket, and a daypack to pack it all. Just in case.
- Wear comfortable shoes to hike in.
- Bring snacks and water with you. Especially when you’re hiking.
- Practice Leave No Trace.
- Stay on the trails! The alpine ecosystem is fragile. Take care of it.
- The park is busiest from 10:00 am until 2:00 pm so get some good time in before it gets busy and after daytrippers start leaving.
Mount Rainier 1-Day Itinerary
Mount Rainier National Park is a true gem. It’s so convenient to get to and it fits in perfectly with a road trip through the Pacific Northwest. I hope my 1 day Mount Rainier itinerary helps you plan an incredible trip!
Can you see Mt Rainier in one day?
You can see the highlights of Mt Rainier National Park in one day. As long as you have a good plan!
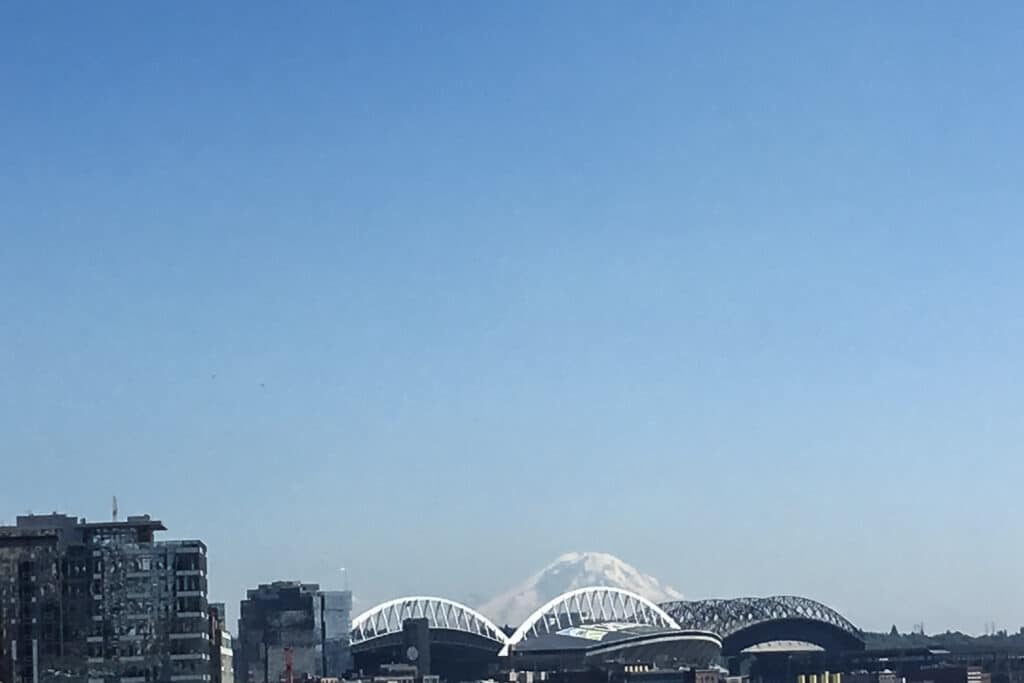
Can you see Mt Rainier without hiking?
Yes! The volcano is visible all the way from Seattle if the weather is clear. But, in the national park, you can get fabulous views of it without having to do lots of hiking. Reflection Lake is a good place to start!
Is there an entrance fee at Mt Rainier?
Mt. Rainier does have an entrance fee. It’s $30 for one week. Or you can do the interagency pass for $80 for the year.